Before you start, download Deploy Dash for free, install it, and complete the first server onboarding flow so you already have a connected server ready to deploy a Laravel app.
If you already have a Laravel repository, you can skip the app creation part and jump straight to Deploy Dash. If you are brand new to PHP or Laravel, this guide shows how to deploy Laravel to production on your own server without hand-configuring Nginx, PHP-FPM, or SSL certificates.
What you need before you start
- A server already connected to Deploy Dash
- A GitHub repository for your Laravel app
- A domain or subdomain you control
Create your Laravel app
Create a new Laravel 13 project locally:
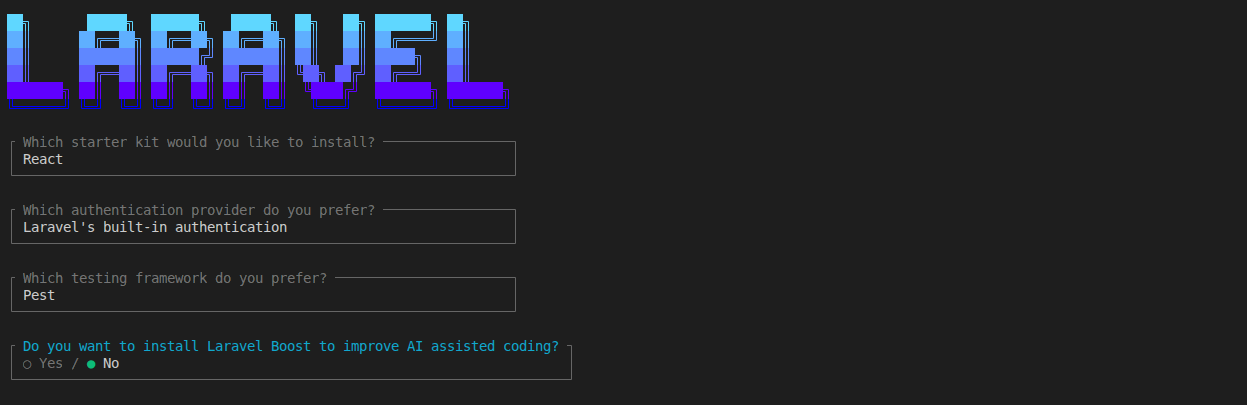
laravel new laravel-example-appFor this walkthrough, the Laravel installer choices were:
- Starter kit: React
- Authentication: Laravel's built-in authentication
- Testing: Pest
- Laravel Boost: No
Laravel will create the project, install Composer dependencies, generate an APP_KEY, create the SQLite database file, run the initial migrations, and build the starter frontend assets.
Push your Laravel app to GitHub
If the repository does not exist yet, initialize Git and push your first commit:
git init
git branch -M main
git remote add origin https://github.com/your-org/your-laravel-app.git
git add .
git commit -m "initial commit"
git push -u origin main
If your repository already exists, just commit and push your latest changes to the branch you want Deploy Dash to track.
Open Deploy Dash and create a project
Open Deploy Dash, unlock the app, and go to the home dashboard.
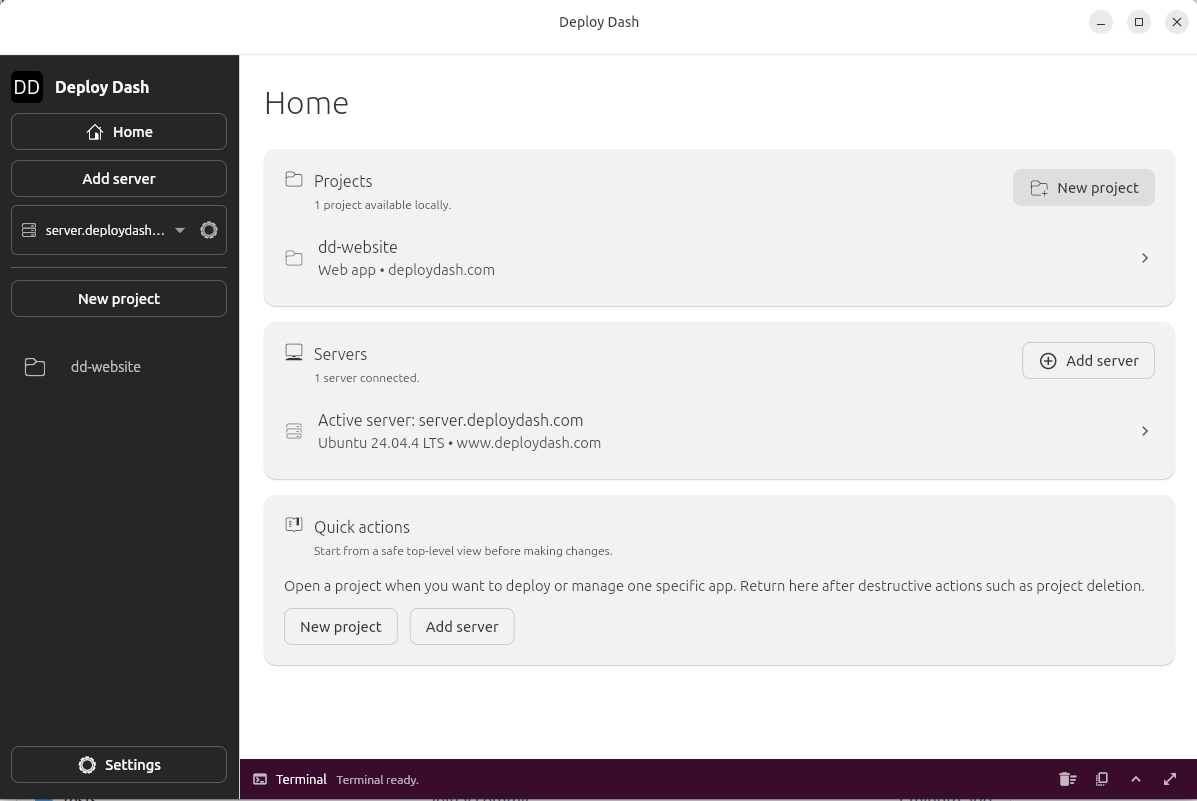
- New projectStart from the Home dashboard by clicking `New project`.
Create a new project and set the runtime to PHP.
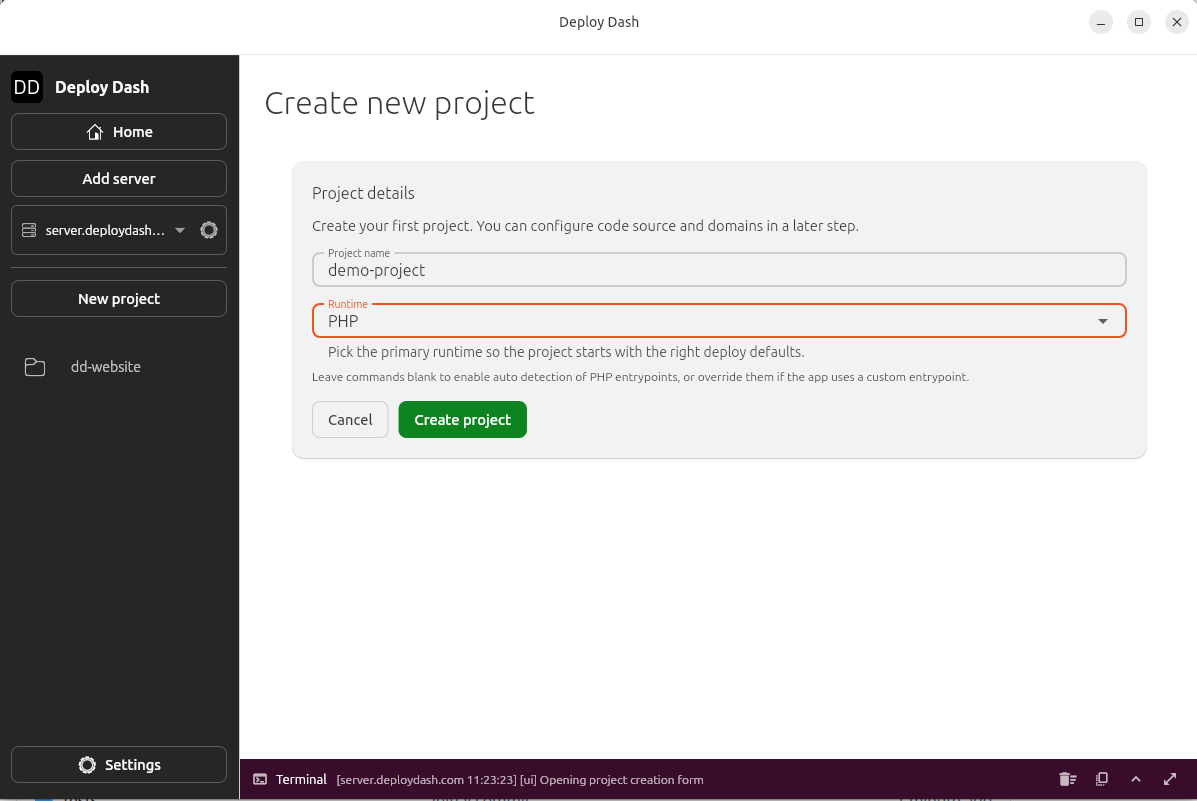
Deploy Dash chooses the PHP runtime from the version declared in composer.json and composer.lock. Make sure they are the same in both files.
Leaving the build and run commands blank tells Deploy Dash to use the PHP provider defaults for you.
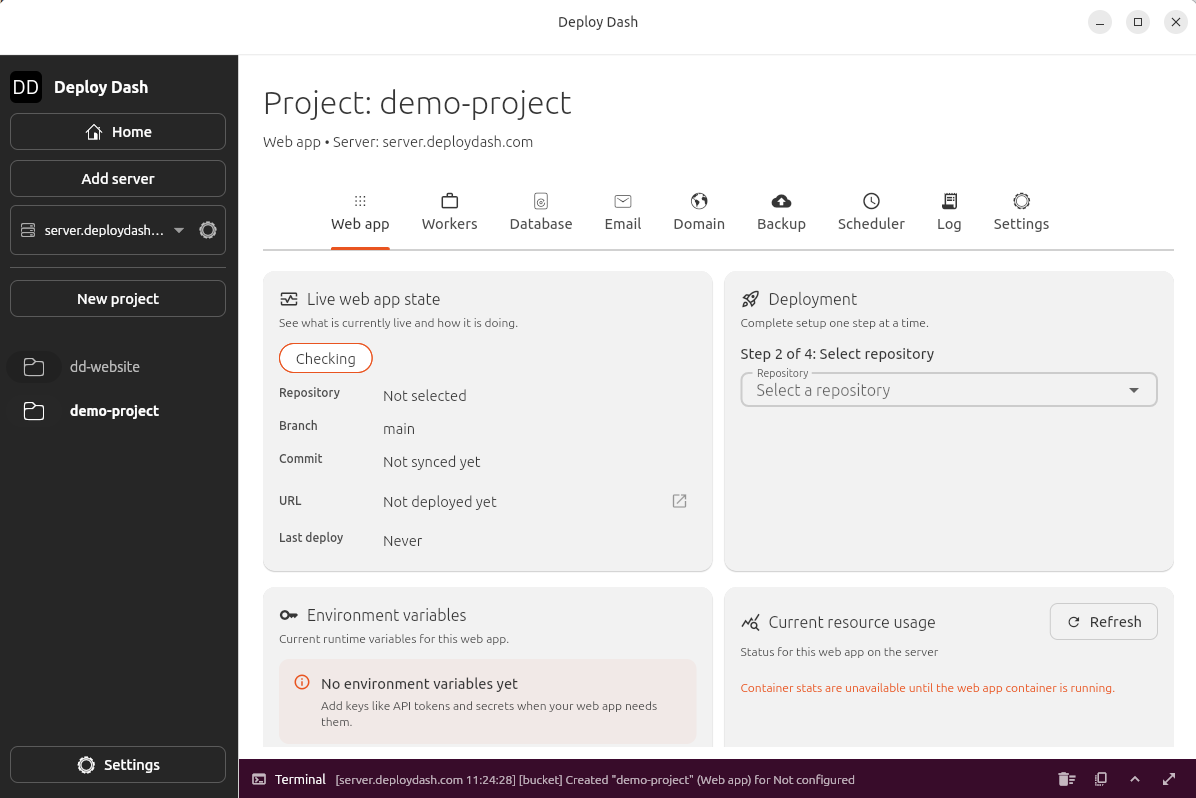
Connect the GitHub repository and Laravel deployment settings
Inside the project workspace, open the web app deployment settings and configure:
- Repository: your Laravel GitHub repository
- Branch:
mainor your chosen deploy branch - Primary domain: a real domain or subdomain such as
testapp.deploydash.com - Runtime:
PHP - Web app port:
8080 - Build command: leave blank
- Run command: leave blank
- App subdirectory: leave blank unless Laravel lives in a monorepo subfolder
- Connect repoSelect the Laravel GitHub repository that Deploy Dash should deploy.

Use this screen to confirm the deploy settings:
Primary domain: set the real hostname you want to publish, such astestapp.deploydash.comBranch: choose the deploy branch that Deploy Dash should trackWeb app port: use8080for the default Laravel PHP runtimeRuntime: set this toPHPBuild command: leave blank for a standard Laravel appRun command: leave blank for a standard Laravel appApp subdirectory: leave blank unless Laravel lives in a monorepo subfolder
For a standard Laravel repository, blank build and run commands are the fastest path because Deploy Dash can infer the normal PHP build flow automatically.
Add the Laravel environment variables in Deploy Dash
For this starter app, add APP_KEY, APP_URL, and ASSET_URL in Deploy Dash.
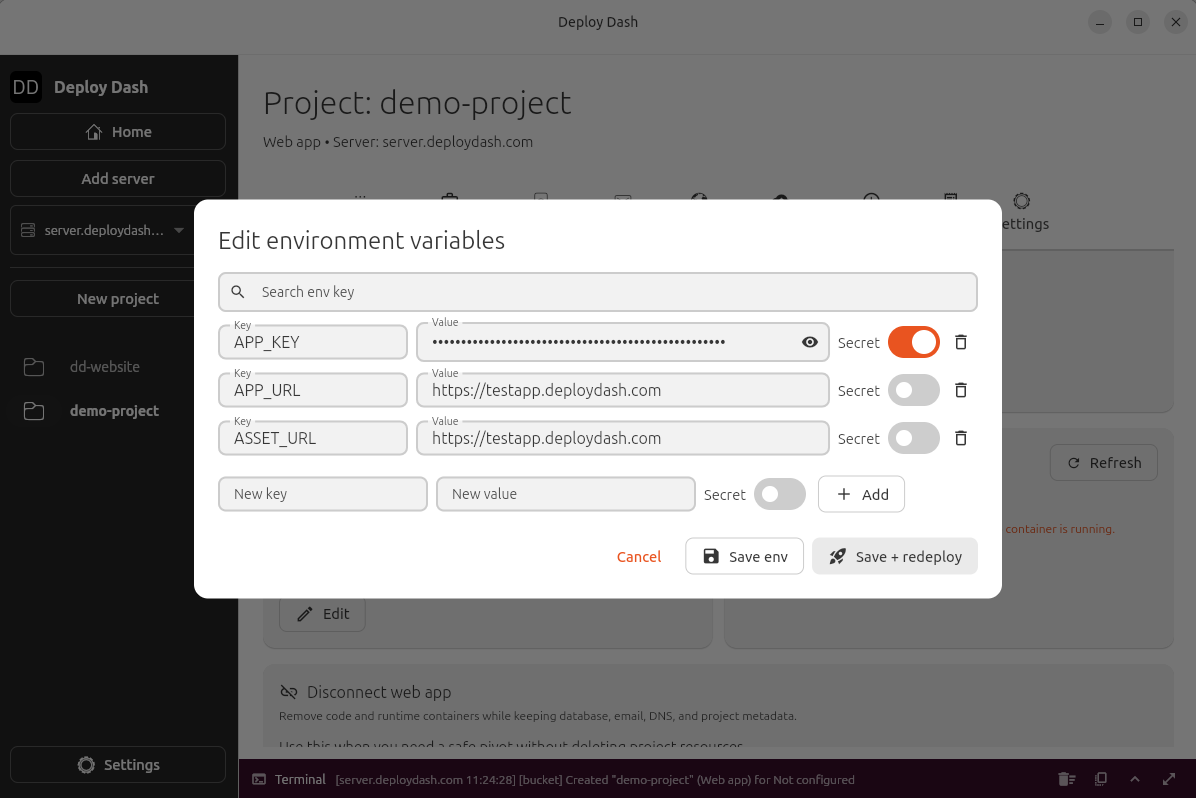
Use these values:
APP_KEY: copy the value from your local.envAPP_URL: set it to the public HTTPS URL for the deployed appASSET_URL: set it to the same HTTPS URL so generated asset links stay correct
After saving the variables, redeploy so Laravel rebuilds its cached configuration with the correct HTTPS values.
Do not commit your real .env file to GitHub. Put secrets into Deploy Dash instead.
Deploy the Laravel app
Once the repository, domain, and environment variables are set, the project is ready to deploy.
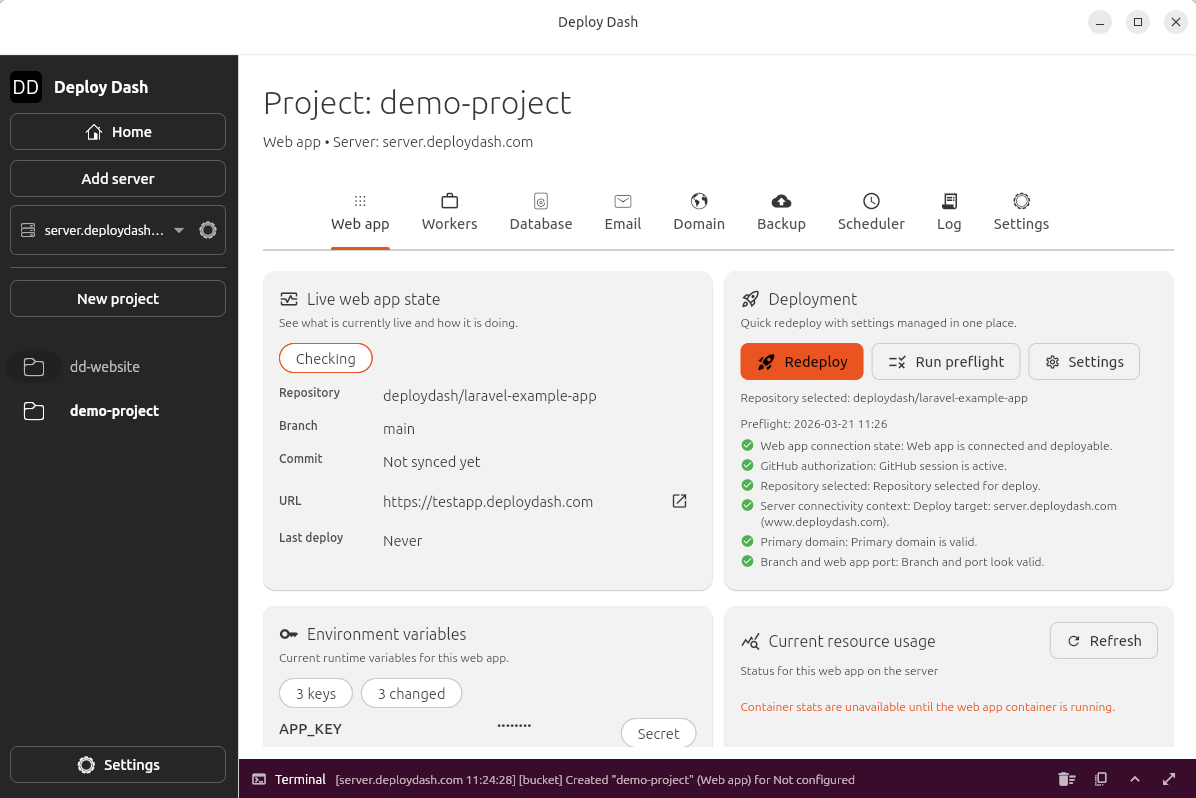
- DeployClick `Redeploy` when the repository, domain, and environment variables are ready.
Click deploy. In this walkthrough, the build logs showed Deploy Dash:
The blank build and run commands keep the default PHP provider flow intact. That means Deploy Dash handles the normal Laravel production path for you, including dependency install, frontend asset compilation, framework optimization, startup-time Laravel housekeeping, and an HTTPS endpoint in front of the app.
Verify the live Laravel deployment
After the deploy finishes, open the public URL from the project page.
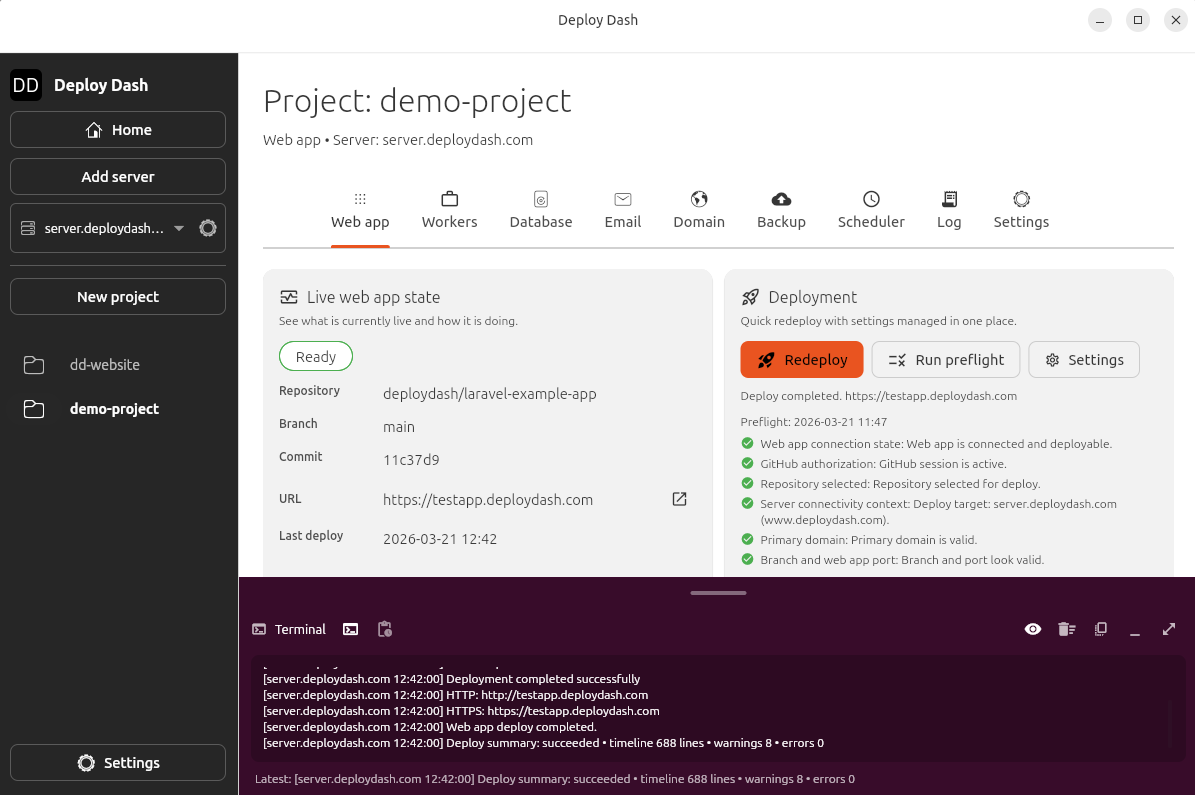
- Live stateLook for the `Ready` state and the published HTTPS URL in the live web app state card before you open the app in the browser.
At this point you should have:
- A live HTTPS Laravel app
- A deploy log tied to the release
- A repeatable deployment flow for future Git pushes
Laravel also includes a built-in health route at /up, so a quick follow-up check is:
curl https://your-domain.example/upIf the app booted successfully, Laravel should return HTTP 200.
In this walkthrough, the build logs showed Deploy Dash:
- Cloning the GitHub repository
- Injecting environment variables into the container
- Running
composer install - Running
npm ci,npm prune, andnpm run build - Preparing the Laravel runtime image and caching framework metadata
- Starting the container with the default PHP provider runtime
- Running Laravel startup tasks such as migrations, seeding, storage symlink setup, and application optimization
- Starting FrankenPHP using the generated Caddy configuration and publishing the app through Deploy Dash over HTTPS
Common Laravel deployment mistakes
Composer fails with a PHP version error
If the deploy log says packages in composer.lock require php >=8.4, your lock file was likely generated on a newer local PHP version than your deployment target. Resolve the lock file against the target PHP version before you push.
Deploy Dash chooses the PHP runtime from the version declared in composer.json. If your local machine generates composer.lock using a different PHP version than the one declared in composer.json, the deploy can fail because the lock file and the declared runtime do not agree. If that happens, regenerate the lock file for the PHP version declared in composer.json before you push:
cd laravel-example-app
composer config platform.php 8.3.30
composer update
composer config --unset platform.php
That tells Composer to calculate the lock file as if it were running on PHP 8.3, so it matches the runtime Deploy Dash will infer from composer.json.
Repository clone fails
If Deploy Dash cannot clone the repository, check that:
- the owner and repository name are correct
- the selected GitHub token can manage deploy keys for that repository
- the branch you selected actually exists
Deploy Dash says the primary domain is invalid
Use a full hostname such as app.example.com, not just example or an empty field.
Laravel fails because `APP_KEY` is missing
Generate it locally if needed:
php artisan key:generateThen copy the generated value into Deploy Dash as the APP_KEY environment variable.
Login redirects or form posts try to use `http://` instead of `https://`
If the deployed app loads over HTTPS but Laravel generates an http:// URL after login or during an XHR form post, the app is usually not trusting the reverse proxy headers that tell it the original request scheme.
Deploy Dash terminates HTTPS in front of the Laravel container, so Laravel should trust forwarded proxy headers and continue generating secure URLs.
For current Laravel versions, configure trusted proxies in bootstrap/app.php:
use Illuminate\Foundation\Application;
use Illuminate\Foundation\Configuration\Middleware;
use Illuminate\Http\Request;

return Application::configure(basePath: dirname(__DIR__))
    ->withMiddleware(function (Middleware $middleware): void {
        $middleware->trustProxies(
            at: '*',
            headers: Request::HEADER_X_FORWARDED_FOR
                | Request::HEADER_X_FORWARDED_HOST
                | Request::HEADER_X_FORWARDED_PORT
                | Request::HEADER_X_FORWARDED_PROTO,
        );
    })
    ->create();
Also make sure APP_URL and ASSET_URL are set to the public HTTPS URL in Deploy Dash, then redeploy so Laravel rebuilds its cached configuration with the correct values.
Why this Laravel deployment workflow is fast
Deploy Dash removes the repetitive production work around a Laravel deployment:
- No manual reverse proxy setup
- No manual HTTPS certificate setup
- No hand-written deploy shell script
- No guessing about which build steps actually ran
You still keep a standard Laravel repository and a standard Git-based workflow.